My First Personal and Uncensored VCAP-NV Deploy Experience (3V0-41.22)
Background
I’m now almost 3 years (full-time) working with VMware technologies. And since the beginning I’ve succeeded and achieved multiple exams and VCP badges. But never ever have I tried the “next” step by going for a VMware Advanced Professional (VCAP) exam. But now that time has come. I wanted to prove myself that I’ve made progression. Exams and certifications are my own choice and for me a good way to reach personal goals. If you are interested in my experience, I invite you to read the next part of this post. I will explain how I prepared, how the exam was like, and of course about the result.
Preparation
It won’t probably be a surprise if I tell you, that the VMware exam guide, or better known as the exam blueprint is THE way to start. This blueprint is actually very detailed on the subjects you should master before taking the exam.
From that blueprint I started my preparation. First of all I filtered-out the topics where I was less familiar with. These topics were getting more attention than others: first by reading the documentation and some great blogpost from the #vcommunity and secondly by performing these configuration steps in practice. Not once, but multiple times over and over again. As I’m using NSX daily, I had a certain confidence on many topics that I took the risk of skipping them.
One golden tip is to use VMware Hands-on-labs as much as possible (https://pathfinder.vmware.com/v3/page/hands-on-labs). Not only is this a good way to get more hands-on experience, it’s also the perfect opportunity to get familiar with a very similar environment as you will get on the exam. By using HoL, you can experience the performance and latency such virtual environment can have. Not everything will go as fast and smooth as you would have in real-life.
Secondly I took the time to just “play around” in an own freshly installed NSX-T environment. This give you the opportunity to refresh your knowledge on how to setup NSX-T and which steps/profiles/… are needed. Certainly when you have experience with NSX-T <= 2.5 it’s highly recommended to practice on NSX-T 3.x as the UI has changed drastically. The exam environment is running NSX-T 3.x (as described in the blueprint). And if you are still running NSX-T 2.5, please update asap. These versions are not longer supported, but nevertheless I wanted to mention it.
Exam
You can call me old-school, but I decided to take the exam in a physical exam centre. Personally this gives me more of an exam vibe and my focus is better. On the one-hour drive to the exam centre, I get into a good exam mood. During that time I can repeat some of the configuration steps in my head as a final prep. Whenever there is a topic I’m not sure about, I have the time to quickly look it up before entering the exam.
The exam is very similar to the Hands-on-Labs environments. Once your exam has started a complete lab environment is booting up. On the left site, you have your desktop to perform you actions and on the other side, you have a small window with your questions. Be sure to perform your exam on a big screen. This definitely makes your experience better. That’s also the reason I travelled to an exam centre further away.
The exam itself consists out of 16 tasks to execute. Take your time to read all the tasks carefully. Some of the tasks are based on previous actions, so be sure to verify your steps before continuing. To save some time I already started the next task while the previous task was still configuring. But be sure to go back to that previous task to verify if your actions were successful. As time seemed not the biggest issue, I made some basis verifications via UI and/or CLI. These verifications are not mandatory, but if you are not doing these, you can have big issues later on during the exam.
To be fair, if you know your stuff and you are saving time as I explained before, you should have plenty of time left. I handed the exam in with +/- 1 hour of spare time. I really had the feeling that I was not pushed to the limit of my three years of experience. In the blueprint they recommend approx 12-24 months and I’m pretty sure that it would more than sufficient. The exam is not containing any exotic stuff, it’s actually a very good and complete exam which proves that you have regular hands-on experience. A great shout-out to the exam contributors. It’s a decent and very organised exam lab!
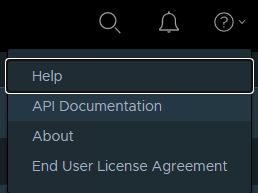
A last quick tip: don’t learn any API calls by heart. If you are familiar with the NSX API and Postman, please use the API Documentation available in the NSX-T UI. The “Help” and “API Documentation” links are also working during the exam.
Result
When you finish the exam, you get a small information textbook mentioning that results can take up to 48 hours, but I got a small sneak peak of my result around 24 hours later. I got a mail from Credly to inform me that a new badge was issued to me. Only few hours later, I got the official exam score report. I passed! So happy with this result and I would like to thank ITQ for giving me all these opportunities and chances to make such a great personal and professional progress.
Next goal: VCIX-NV